I got the urge to build an airplane after a hiatus from active flying lasting almost ten years. My early career as a charter pilot had led to "burn-out" with flying. My present career as an Air Traffic Controller has kept me involved with aviation, but at a different level. I decided that I wanted to re-enter active flying solely on a recreational level. The objective is to learn and have fun. Therefore, I decided that I should build an airplane.
My wife informed me that I could not even begin to consider purchasing an airplane kit until I had a place to construct it. This gave me an excuse to build a shop. I decided that I wanted something more than a metal shed, so I searched for plans for a building resembling a traditional gambrel roofed barn. I found a suitable design at
www.barnplans.com. Construction began in November, 1999.
The Shop Takes Shape
Soon it began to look like a building. I subcontracted the concrete, shingles, electricity, and gas installation. The rest was accomplished using sweat equity and slave labor (both friends and family).
It took nine months, but by July 2000, the building was ready. A full chronicle of the building process is posted on the
Barnplans.com showcase web site.
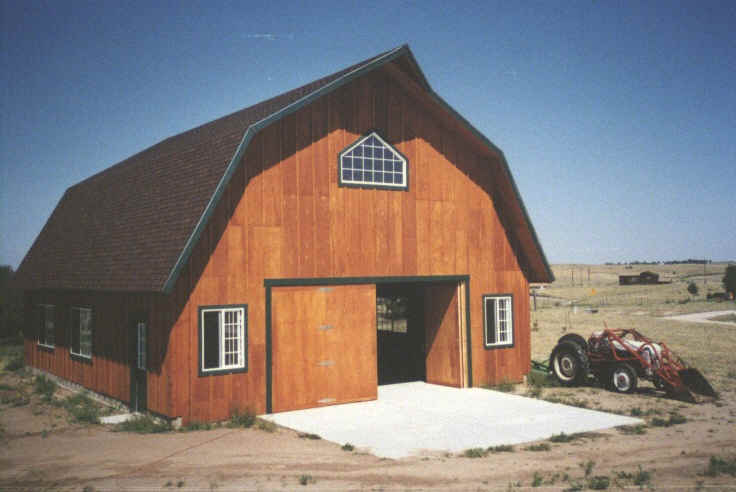
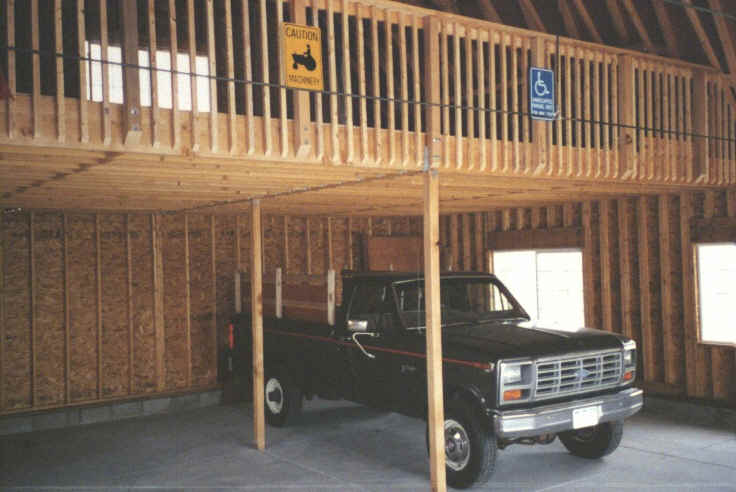
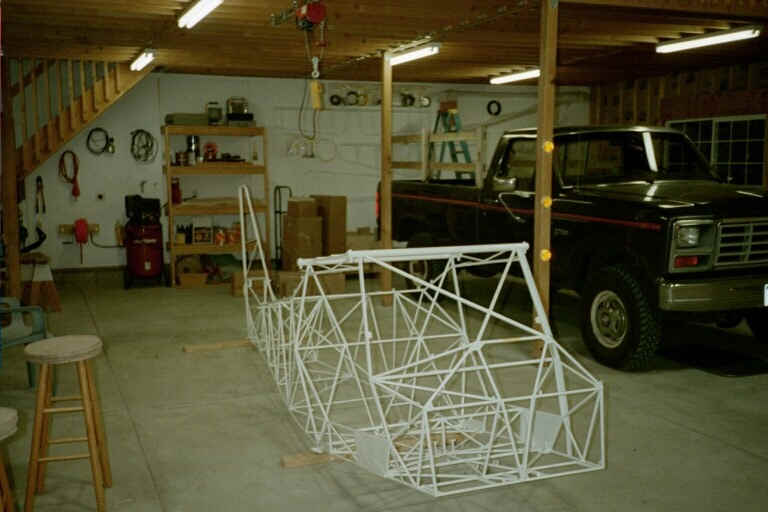
Inside the Shop
Inside the shop there is plenty of room for work and storage. Notice all the loft space. After electricity and insulation was installed, the walls were covered with white heavy duty (1/4 inch) pegboard. Although there is no water/sewer service in the shop, there is heat. Radiant infrared propane heaters are suspended from the ceiling and controlled from a central thermostat.
Which One?
So, what would I build? I prepared a list of the items that I felt were important to me. These items included:
I wanted an aircraft for "low and slow" flying. My desire is to fly purely for fun, not for speed. I also wanted docile behavior so I can use the aircraft to teach my children to fly.
The airplane's planned home base is a grass strip. Therefore I preferred good short field capabilities and a conventional (tail wheel) configuration.
I wanted to purchase a construction kit. Plan built (from scratch) airplanes do not have a great track record when it comes to completing the project. I felt that building from a kit would provide a better opportunity to complete the project.
I wanted to deal with an established and reputable company. Many kit manufacturers have gone out of business - leaving a whole lot of partially completed kits sitting around. I was not willing to become the venture capitalist for a new product.
I wanted a design that was easily mobile. I felt that those aircraft with folding wings would allow me to store the aircraft at my home. If the aircraft was at home, it would be cheaper to keep and easier to maintain.
I attended a Sportair workshop which was an Introduction to Aircraft Building. I decided that I did not enjoy working with composite materials, so I decided to limit myself to wood, fabric, or metal construction.
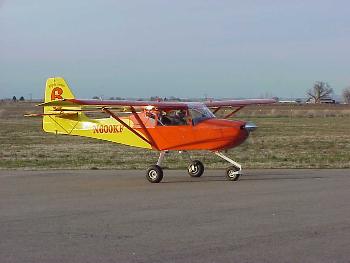
I decided that the aircraft I wanted to build was a Skystar Kitfox Series 6. There have been plenty of Kitfox airplanes built in the past fifteen years. Many are flying and their safety record is good. I thought that I should go see the aircraft, sit in it (I'm not a small person at 230 pounds!) and try it on for size. Where could I go? Oshkosh, of course.
I took my twelve year old son with me and drove from Colorado to Airventure 2001. The Kitfox fit. It felt right. The special offer at the show would allow me to purchase a complete kit at a significant savings, so I put my money where my heart is and ordered the whole thing. Production date was tentatively set for October 1, 2001. This was subsequently delayed until November.
The Kit Arrives
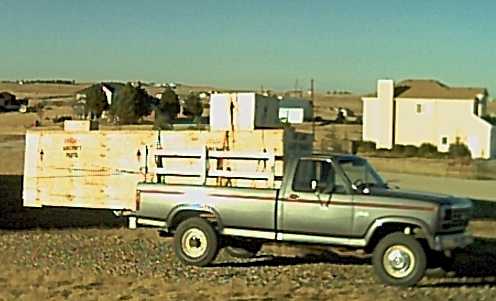
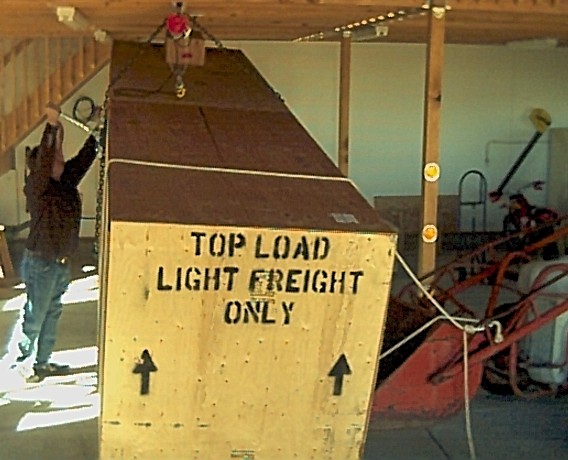
I got a call from Consolidated Freightways that the crate was at their dock on November 14, 2001. Skystar literature said the crate could fit on a full size pickup truck with the gate down. I boldly set off to get the box. It made it onto the pickup, but I would not recommend this approach to anyone. That box is big! The main crate weighed approximately 1300 pounds. It was 17 feet long, 4 feet wide, and 5 feet tall. That smaller crate you see precariously perched on the top contains the Rotax 912S engine.
Now that the crate was at the shop, how would I unload it? I used my trusty 1950 Ford 8N tractor's front end loader to pluck the engine off the top. However, the main crate was too heavy for the tractor. I backed the truck into the shop under the loft area. Then, using a "come along" hoist, I lifted the crate off the truck bed and drove the truck away. The crate was slowly lowered to the ground.
The kit crate included many smaller boxes and loose parts which needed to be checked against the master shipping list. All items were well packaged and marked with a part number and a description. Small parts and hardware items were packaged in individual ZipLoc bags. It took the better part of four days to inventory everything.
I found it very useful to have hardware bins (those little plastic drawers grouped in a cabinet). I filled three cabinets with sixty drawers apiece. The pegboard covered walls provided a great place to group and hang all those smaller items in their bags. The really large items like cowlings, gas tanks, seats, and fairings were stored on shelves in the loft area.
I faxed the list of shortages to Skystar. The shortages were fairly minor. Some bolts, rivets, a spring, and other small items were all that required remedy. A few of the parts were mislabeled - the engine mount was labeled as a pint of cotton flox. Within two days of faxing the completed inventory report, Skystar customer service phoned to let me know the missing parts were on the way.
 Builder's Log - Preparing to Build